Generating product descriptions: The end-to-end guide
This guide will walk you through creating your product description. Our tool makes it easy to create consistent, engaging product descriptions that match your brand.
To get started generating your first product description, follow this step-by-step guide.
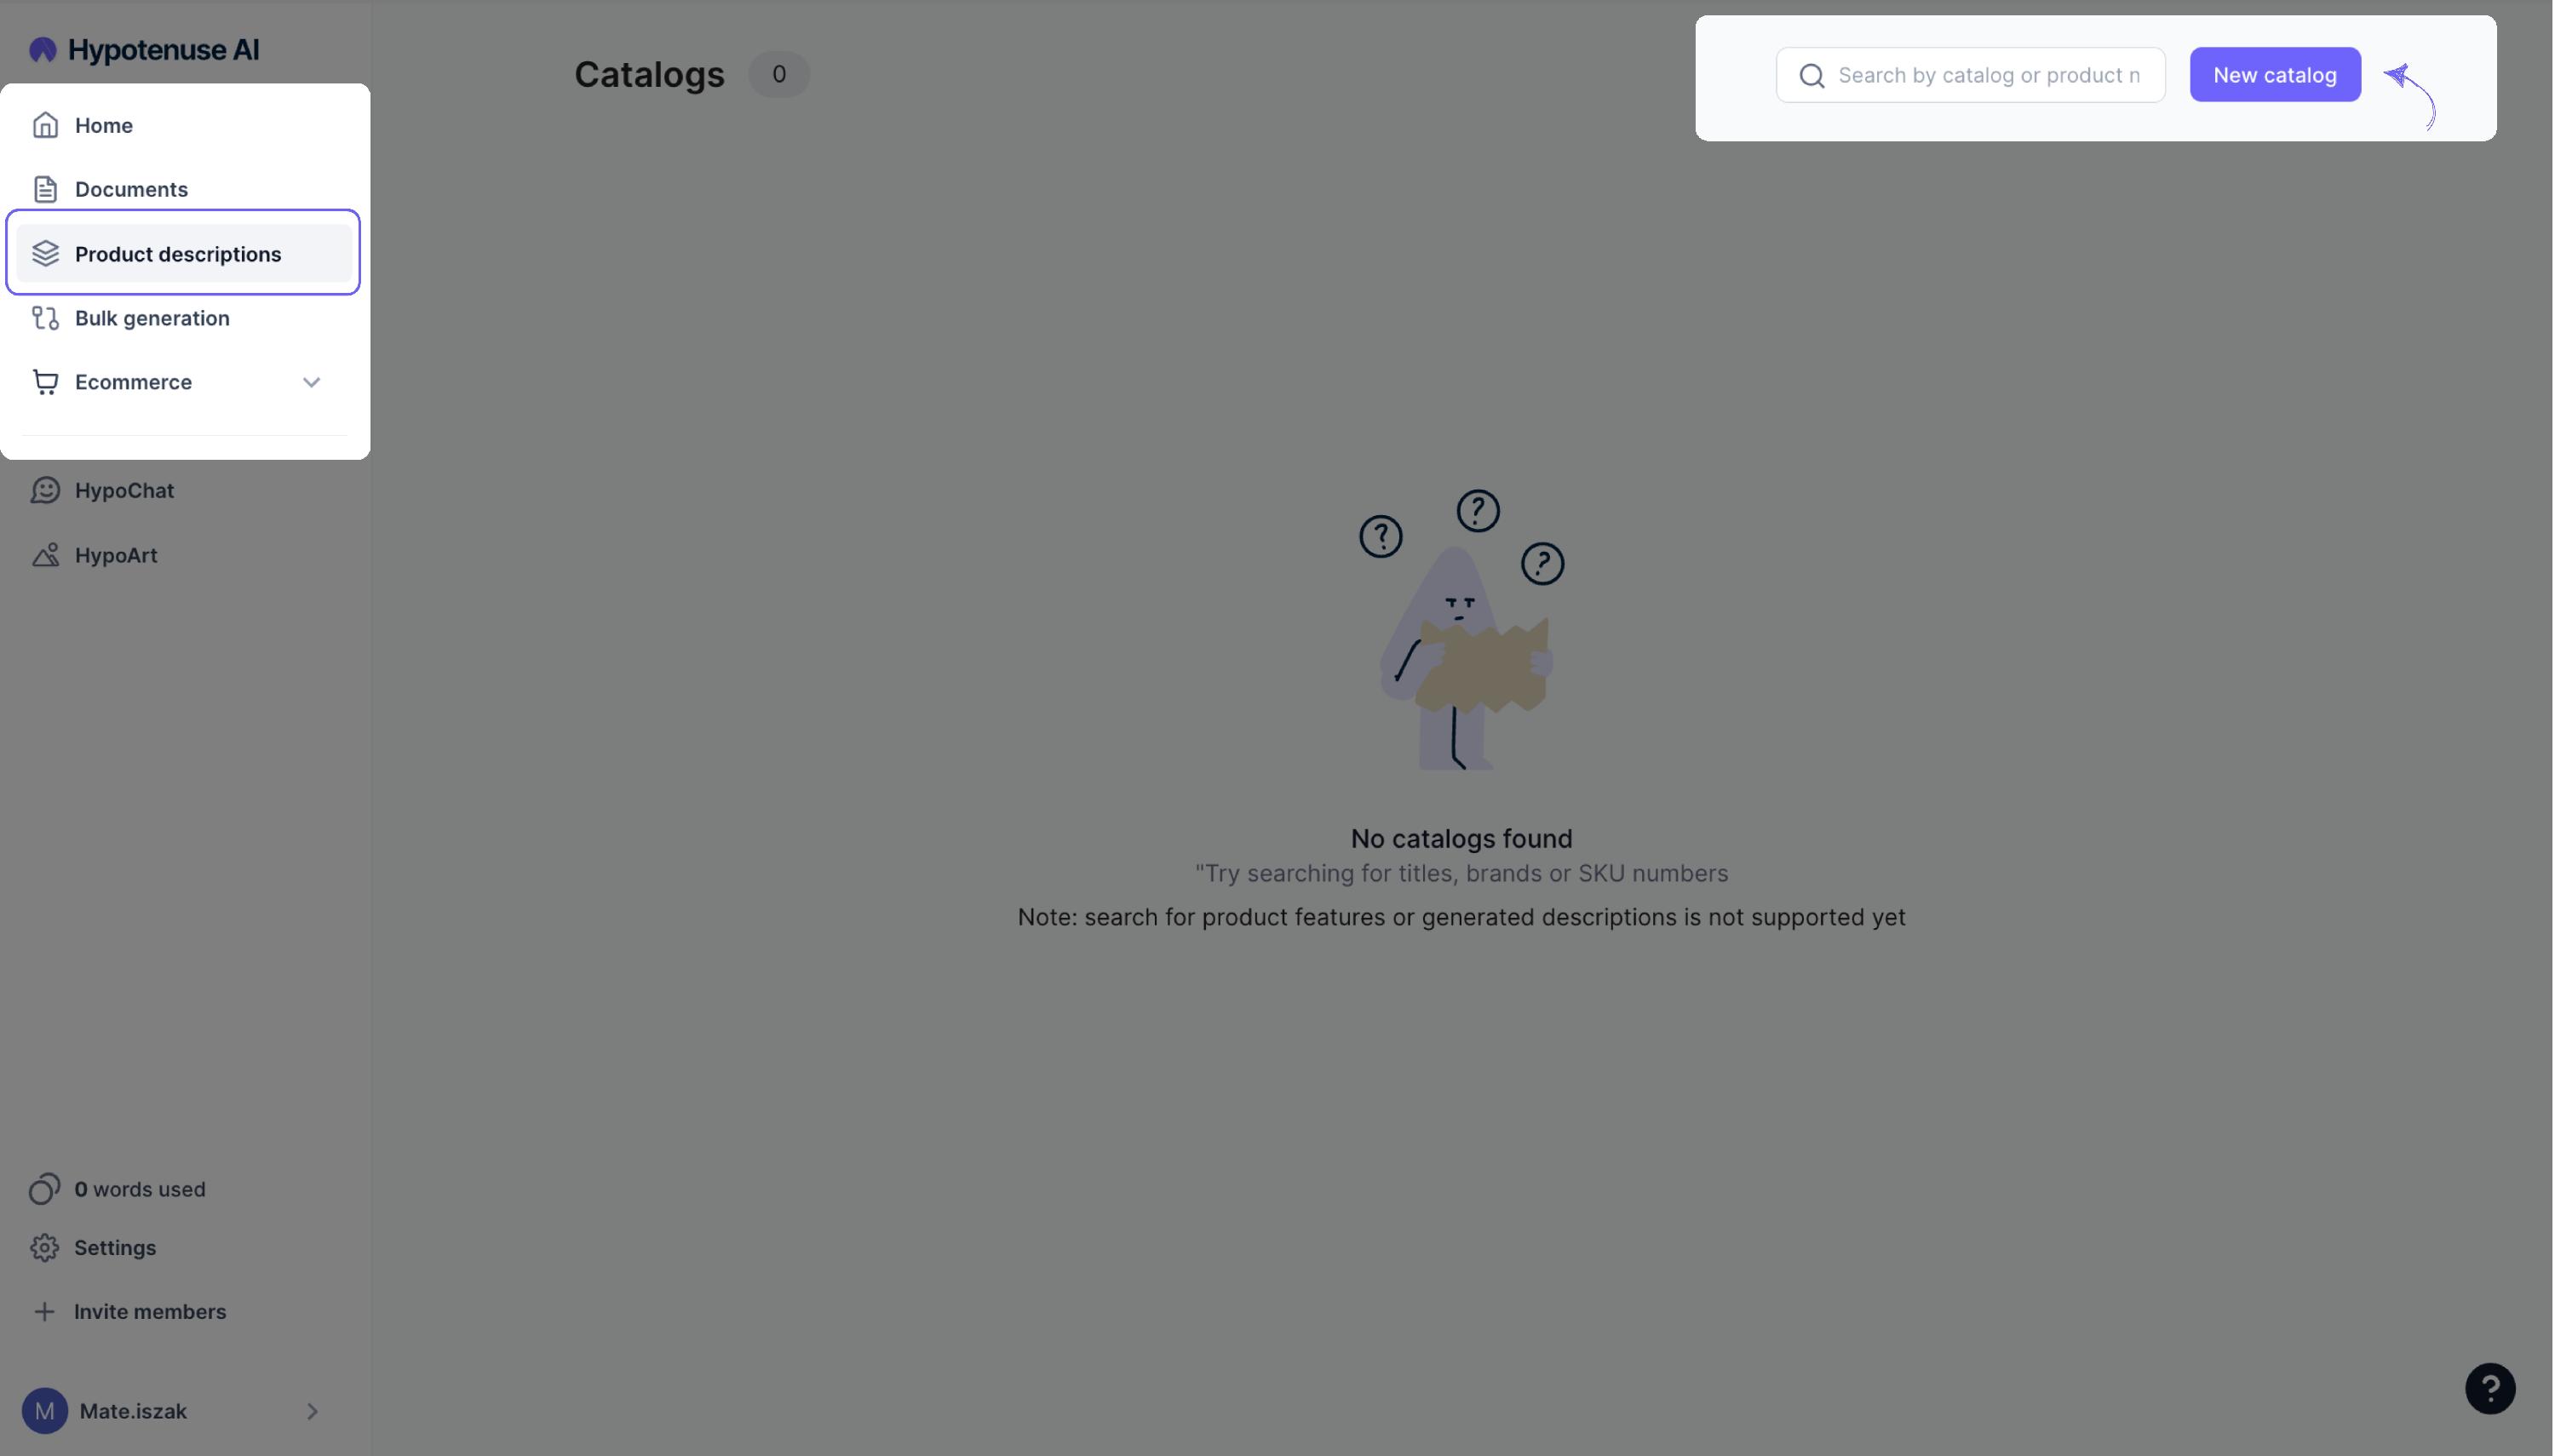
1. Create a Catalog
To get started, create a Catalog. A catalog is a collection of products, which helps you organize and manage them more efficiently. (e.g., Fall/Winter Collection or Valentine’s Day 2025 launch)
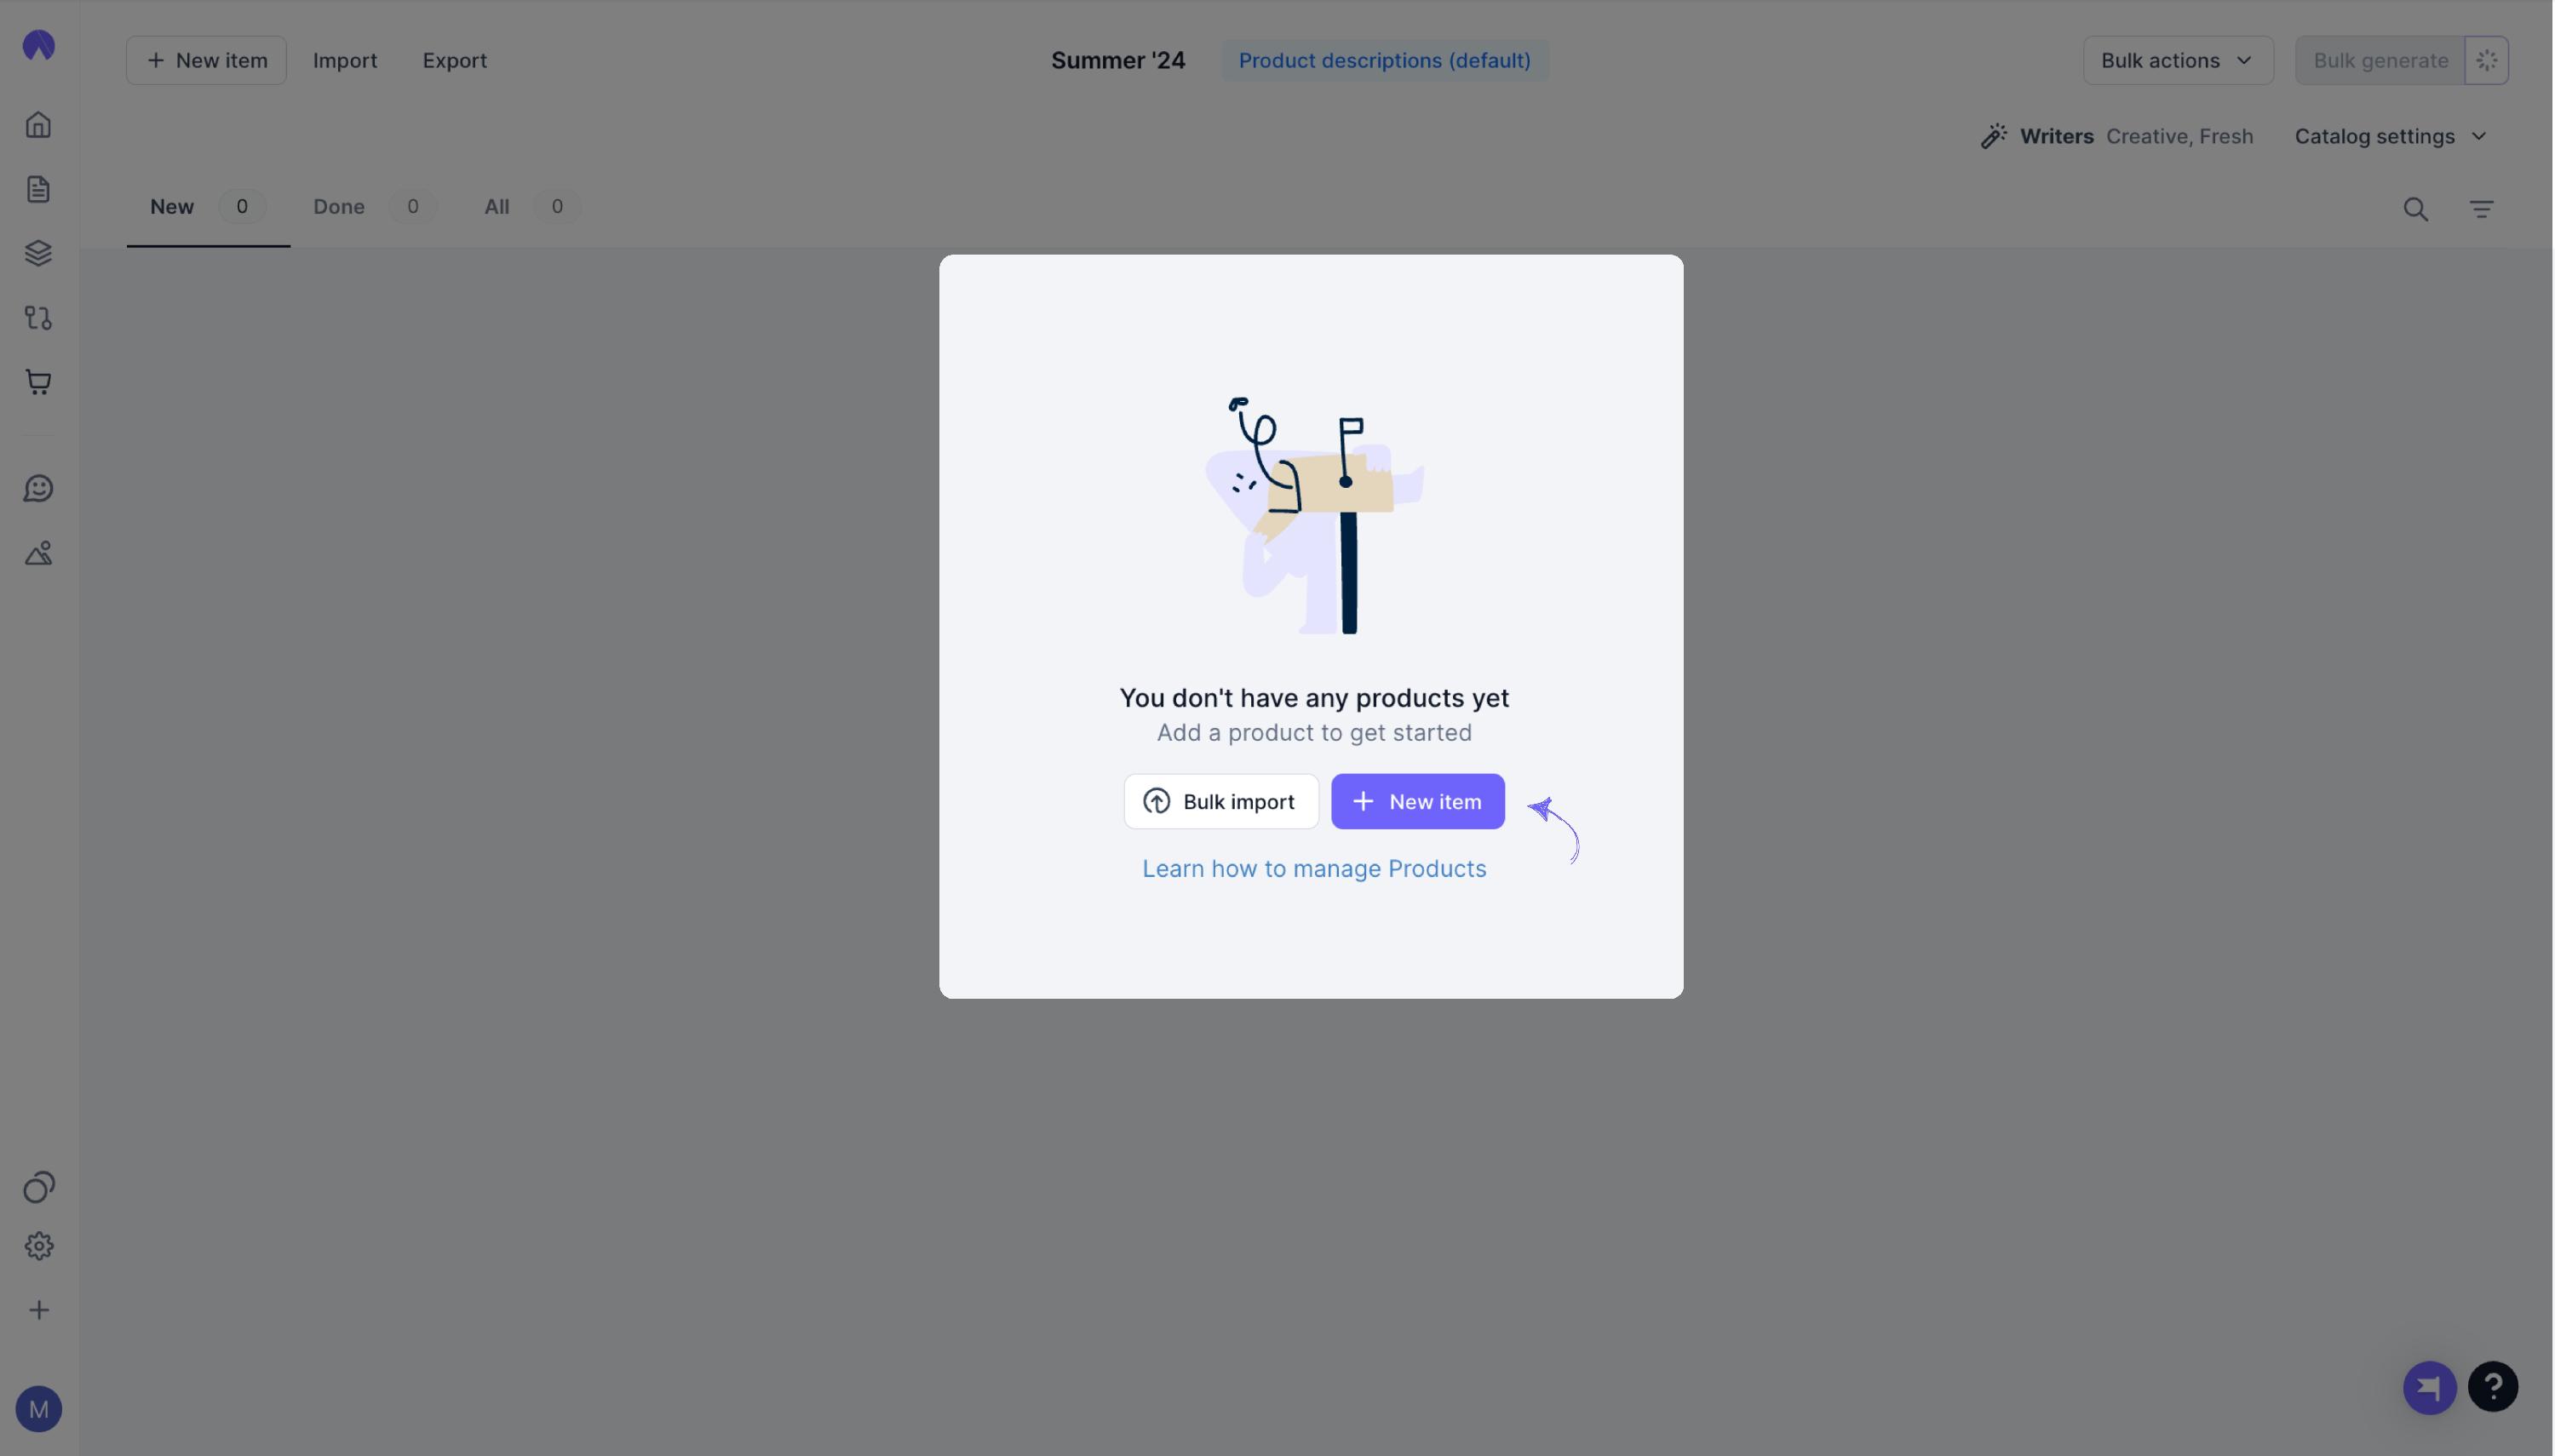
2. Add your Products
Before generating product descriptions, you’ll need to add your products to your catalog. Products can be added in multiple ways — bulk import with a spreadsheet or through custom integrations with your product information management system. You can also upload products individually.
- To add individual products, click "New Item". This is ideal when working with a small number of items, and you can always return to add more later.
- To add products in bulk, click "Bulk Import" and upload your product data using a spreadsheet. This is useful when working with large inventories, saving time and ensuring consistent data input across your catalog.
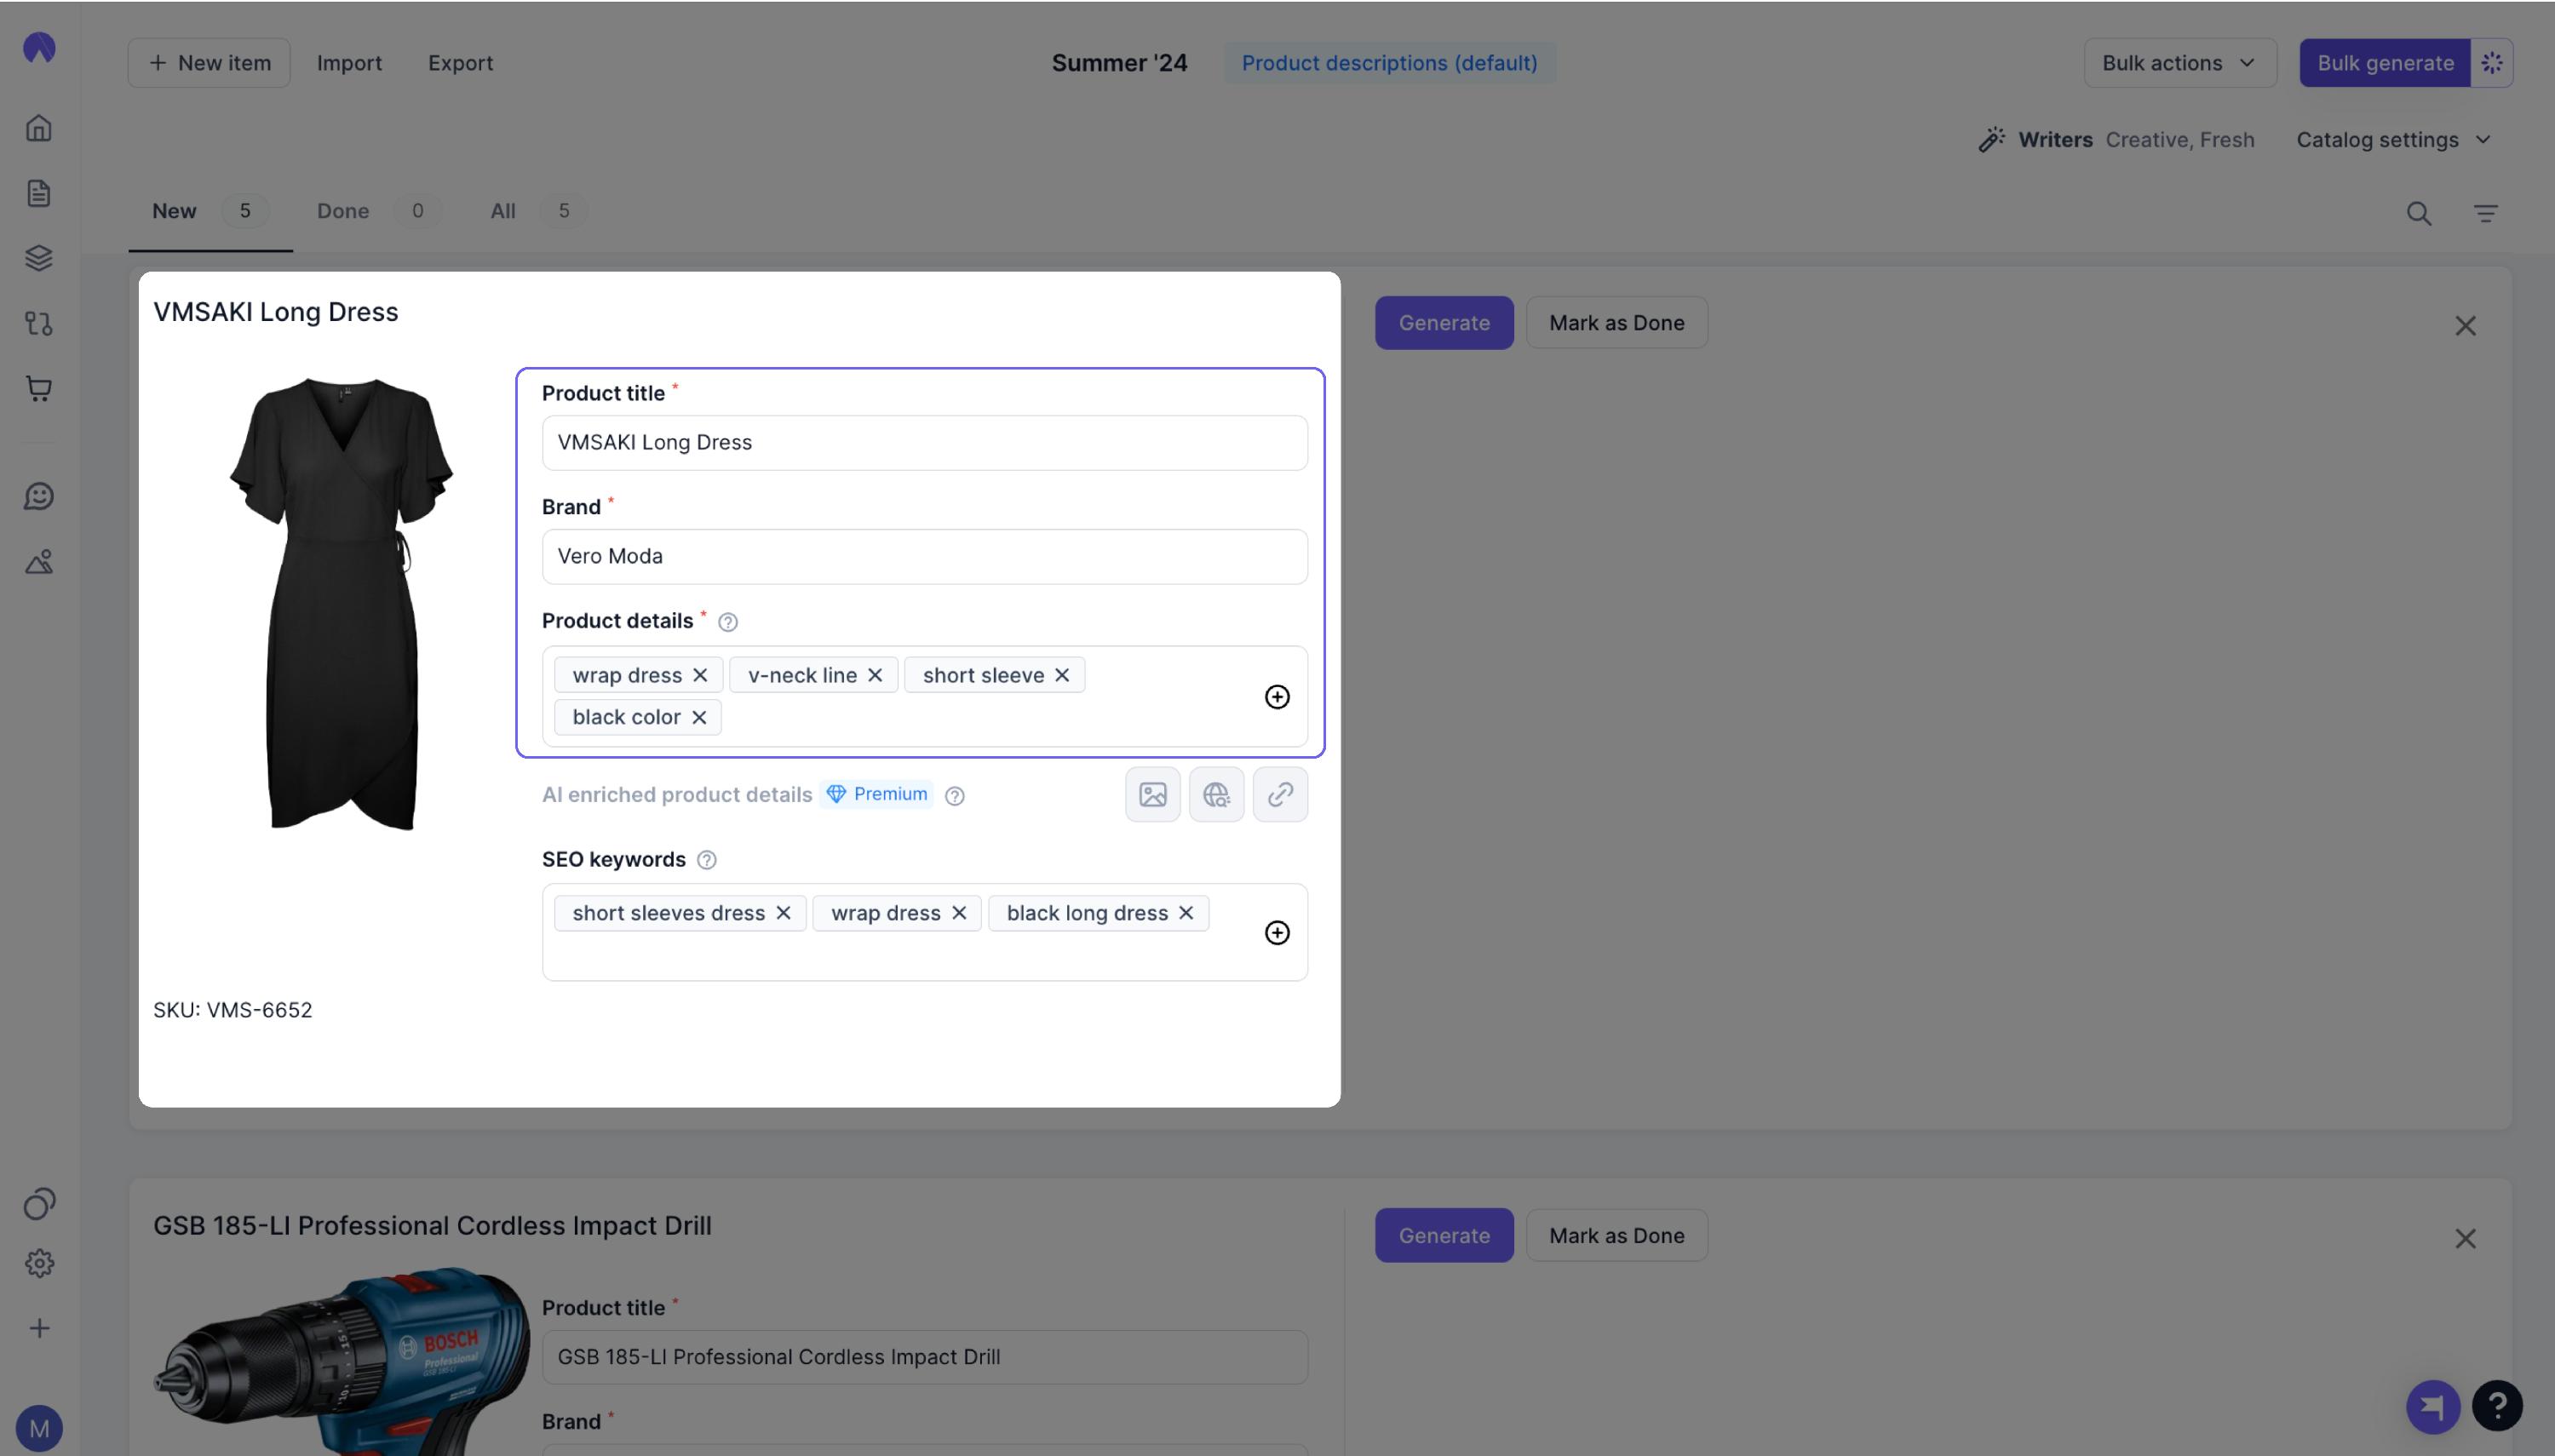
3. Add your Product Details
Our AI needs to know more about your product before it can generate relevant descriptions. Fill in your product details on the left side of the product card.
- Product title: The name of your product.
- Brand: The name of your brand.
- Product details: Product specifications and use cases, like material, style, fit, attribute, or category. (e.g., cotton, slim-fit, breathable, organic, summer, lifestyle) This helps our AI understand your product better to craft more detailed and accurate descriptions.
- If you’re working with sparse product data from vendors where there may be missing product attribute information or you need to manually create product tags from product images, our AI can automatically do this for you. Check out our enrichment features to learn more about how you can enrich product attributes from “reading” uploaded product images or by sourcing data from the web.
- High-quality image: Uploading an image is optional, but doing so can help our AI better understand your product. It can also act as a good reference point when you review and edit your descriptions.
-
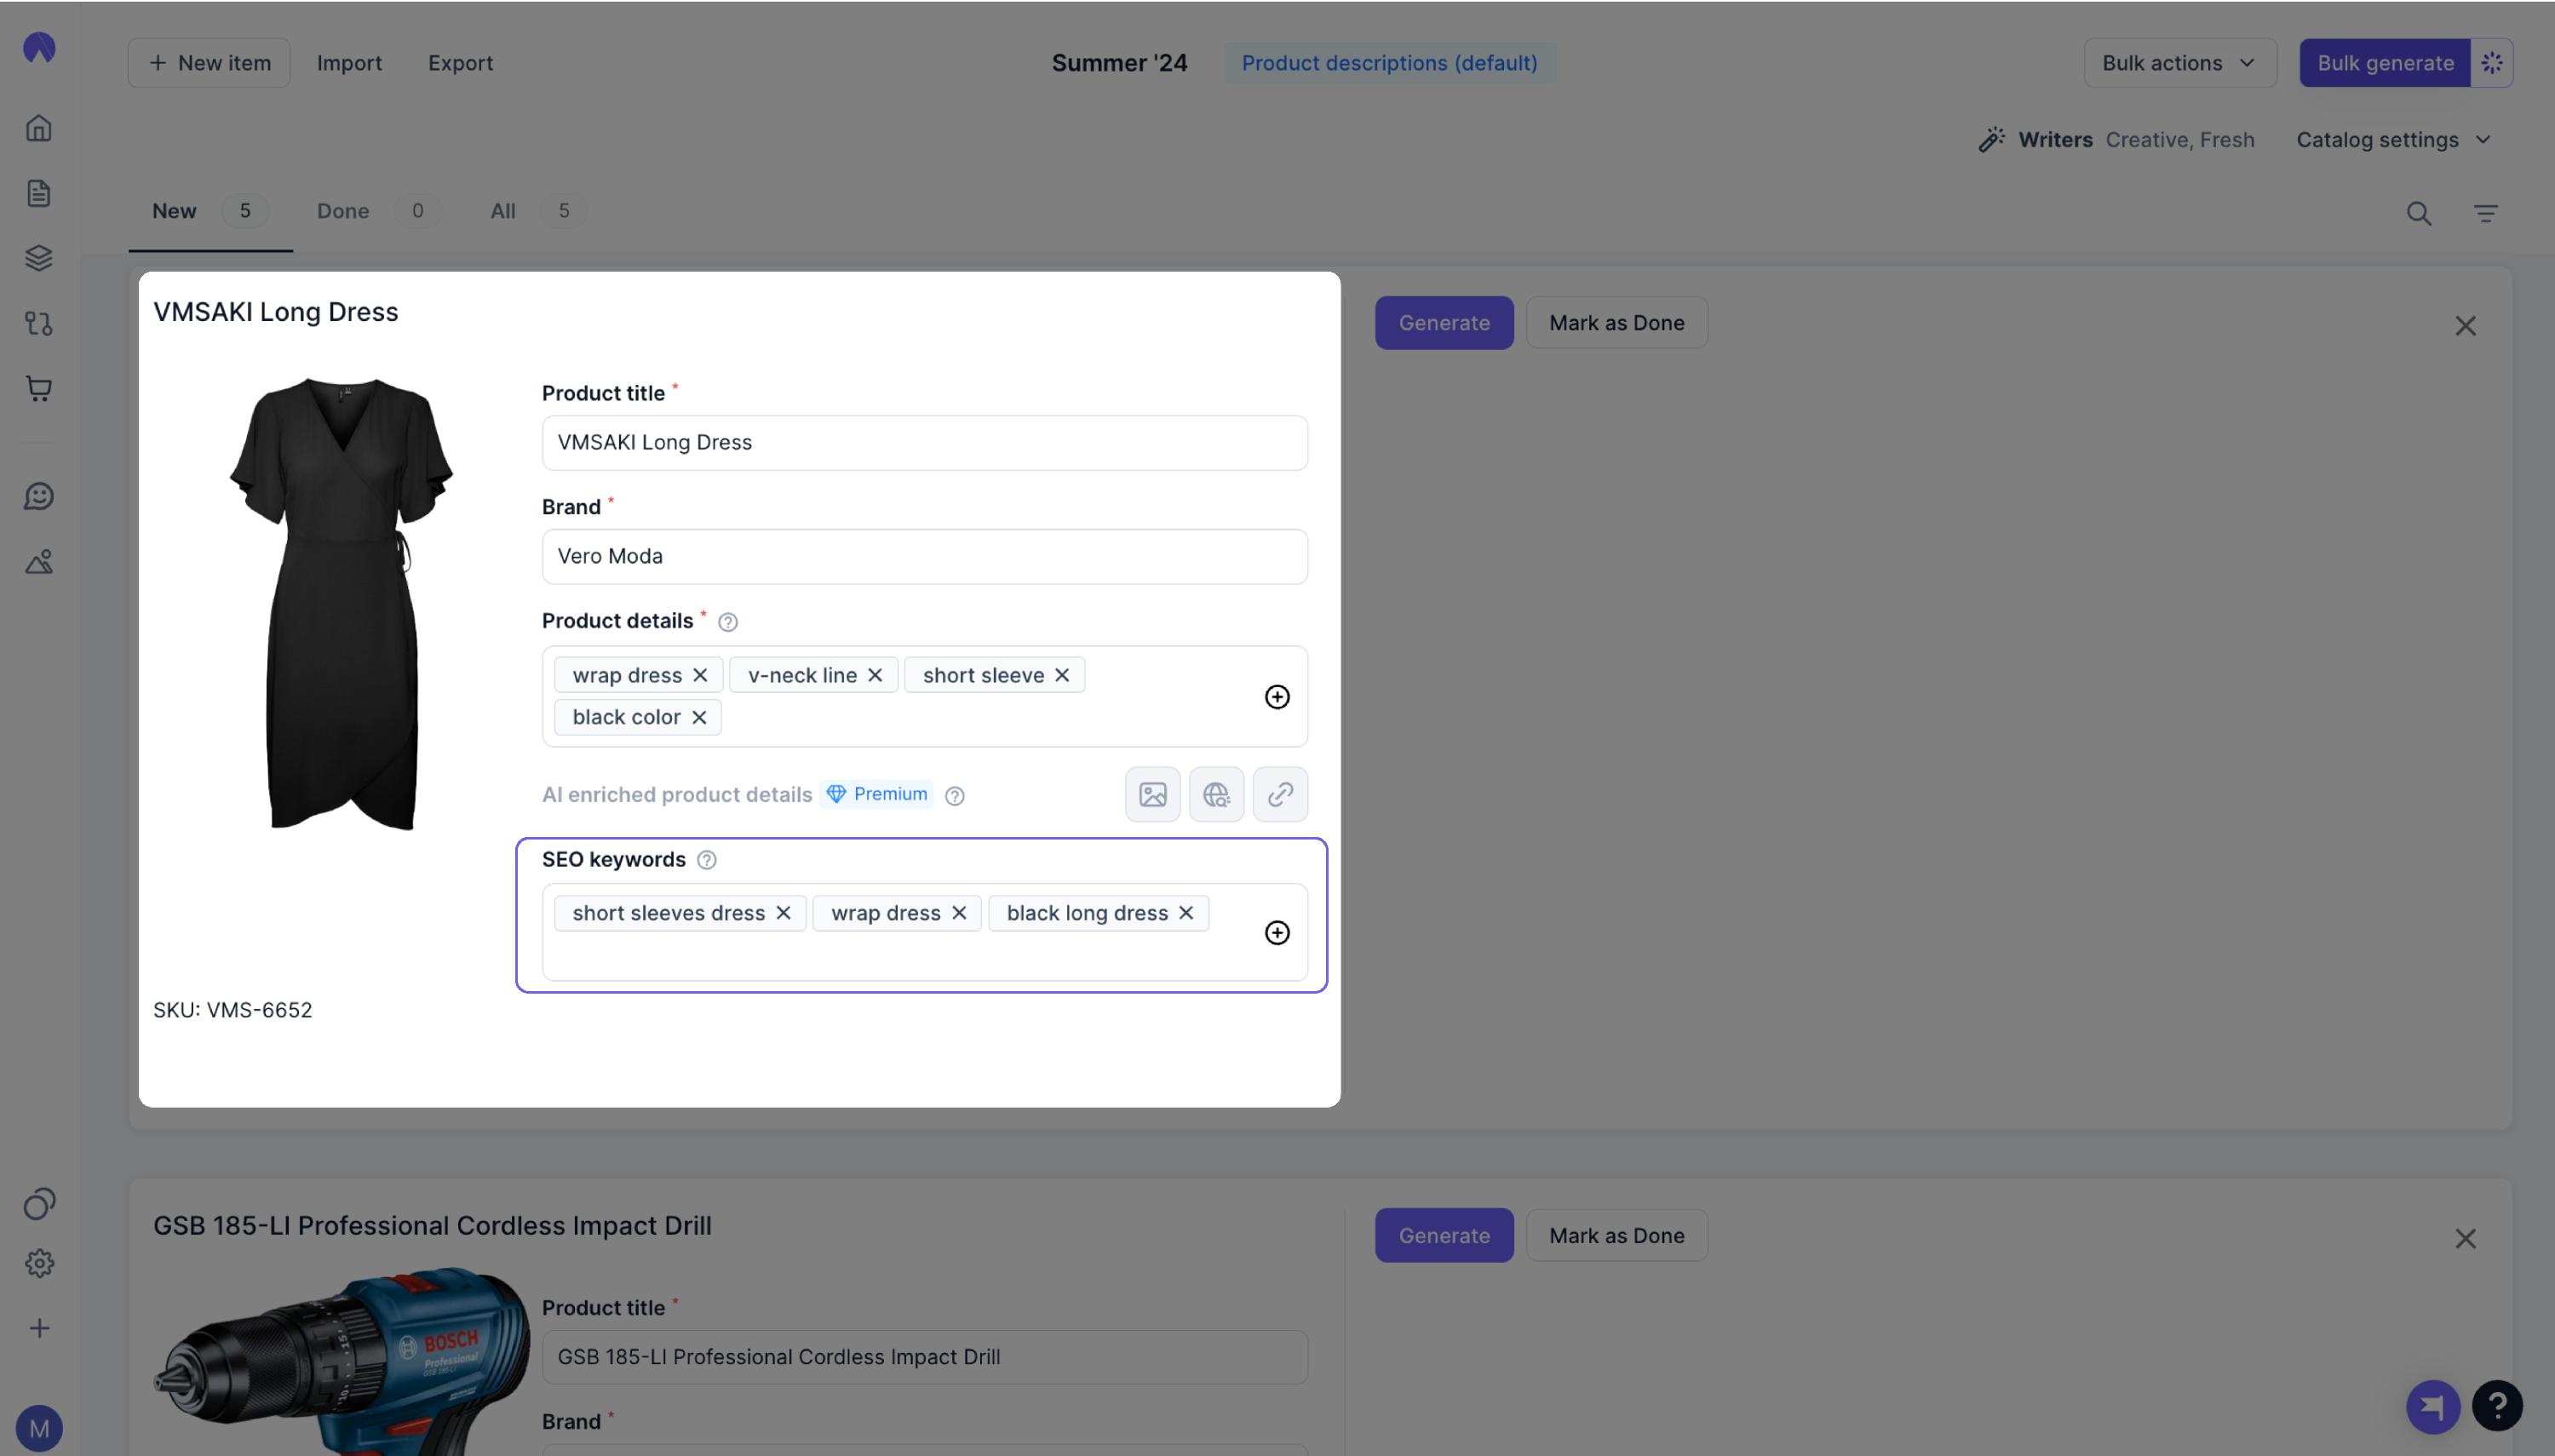
SEO keywords (optional): These are words or phrases that potential customers might type into search engines like Google when looking for products like yours. Including relevant keywords in your product descriptions helps search engines understand what your product is about, which can improve your chances of appearing in search results.
If your product has specific selling points, (e.g., being eco-friendly) be sure to highlight these features. This makes your product more appealing to customers searching for those specific qualities, which can increase the chances of them clicking on your listing. On our premium plans, you can make use of our Smart Suggest feature for our AI to automatically recommend SEO keyword opportunities.
With all your product details populated, you’re ready to create your first set of descriptions!
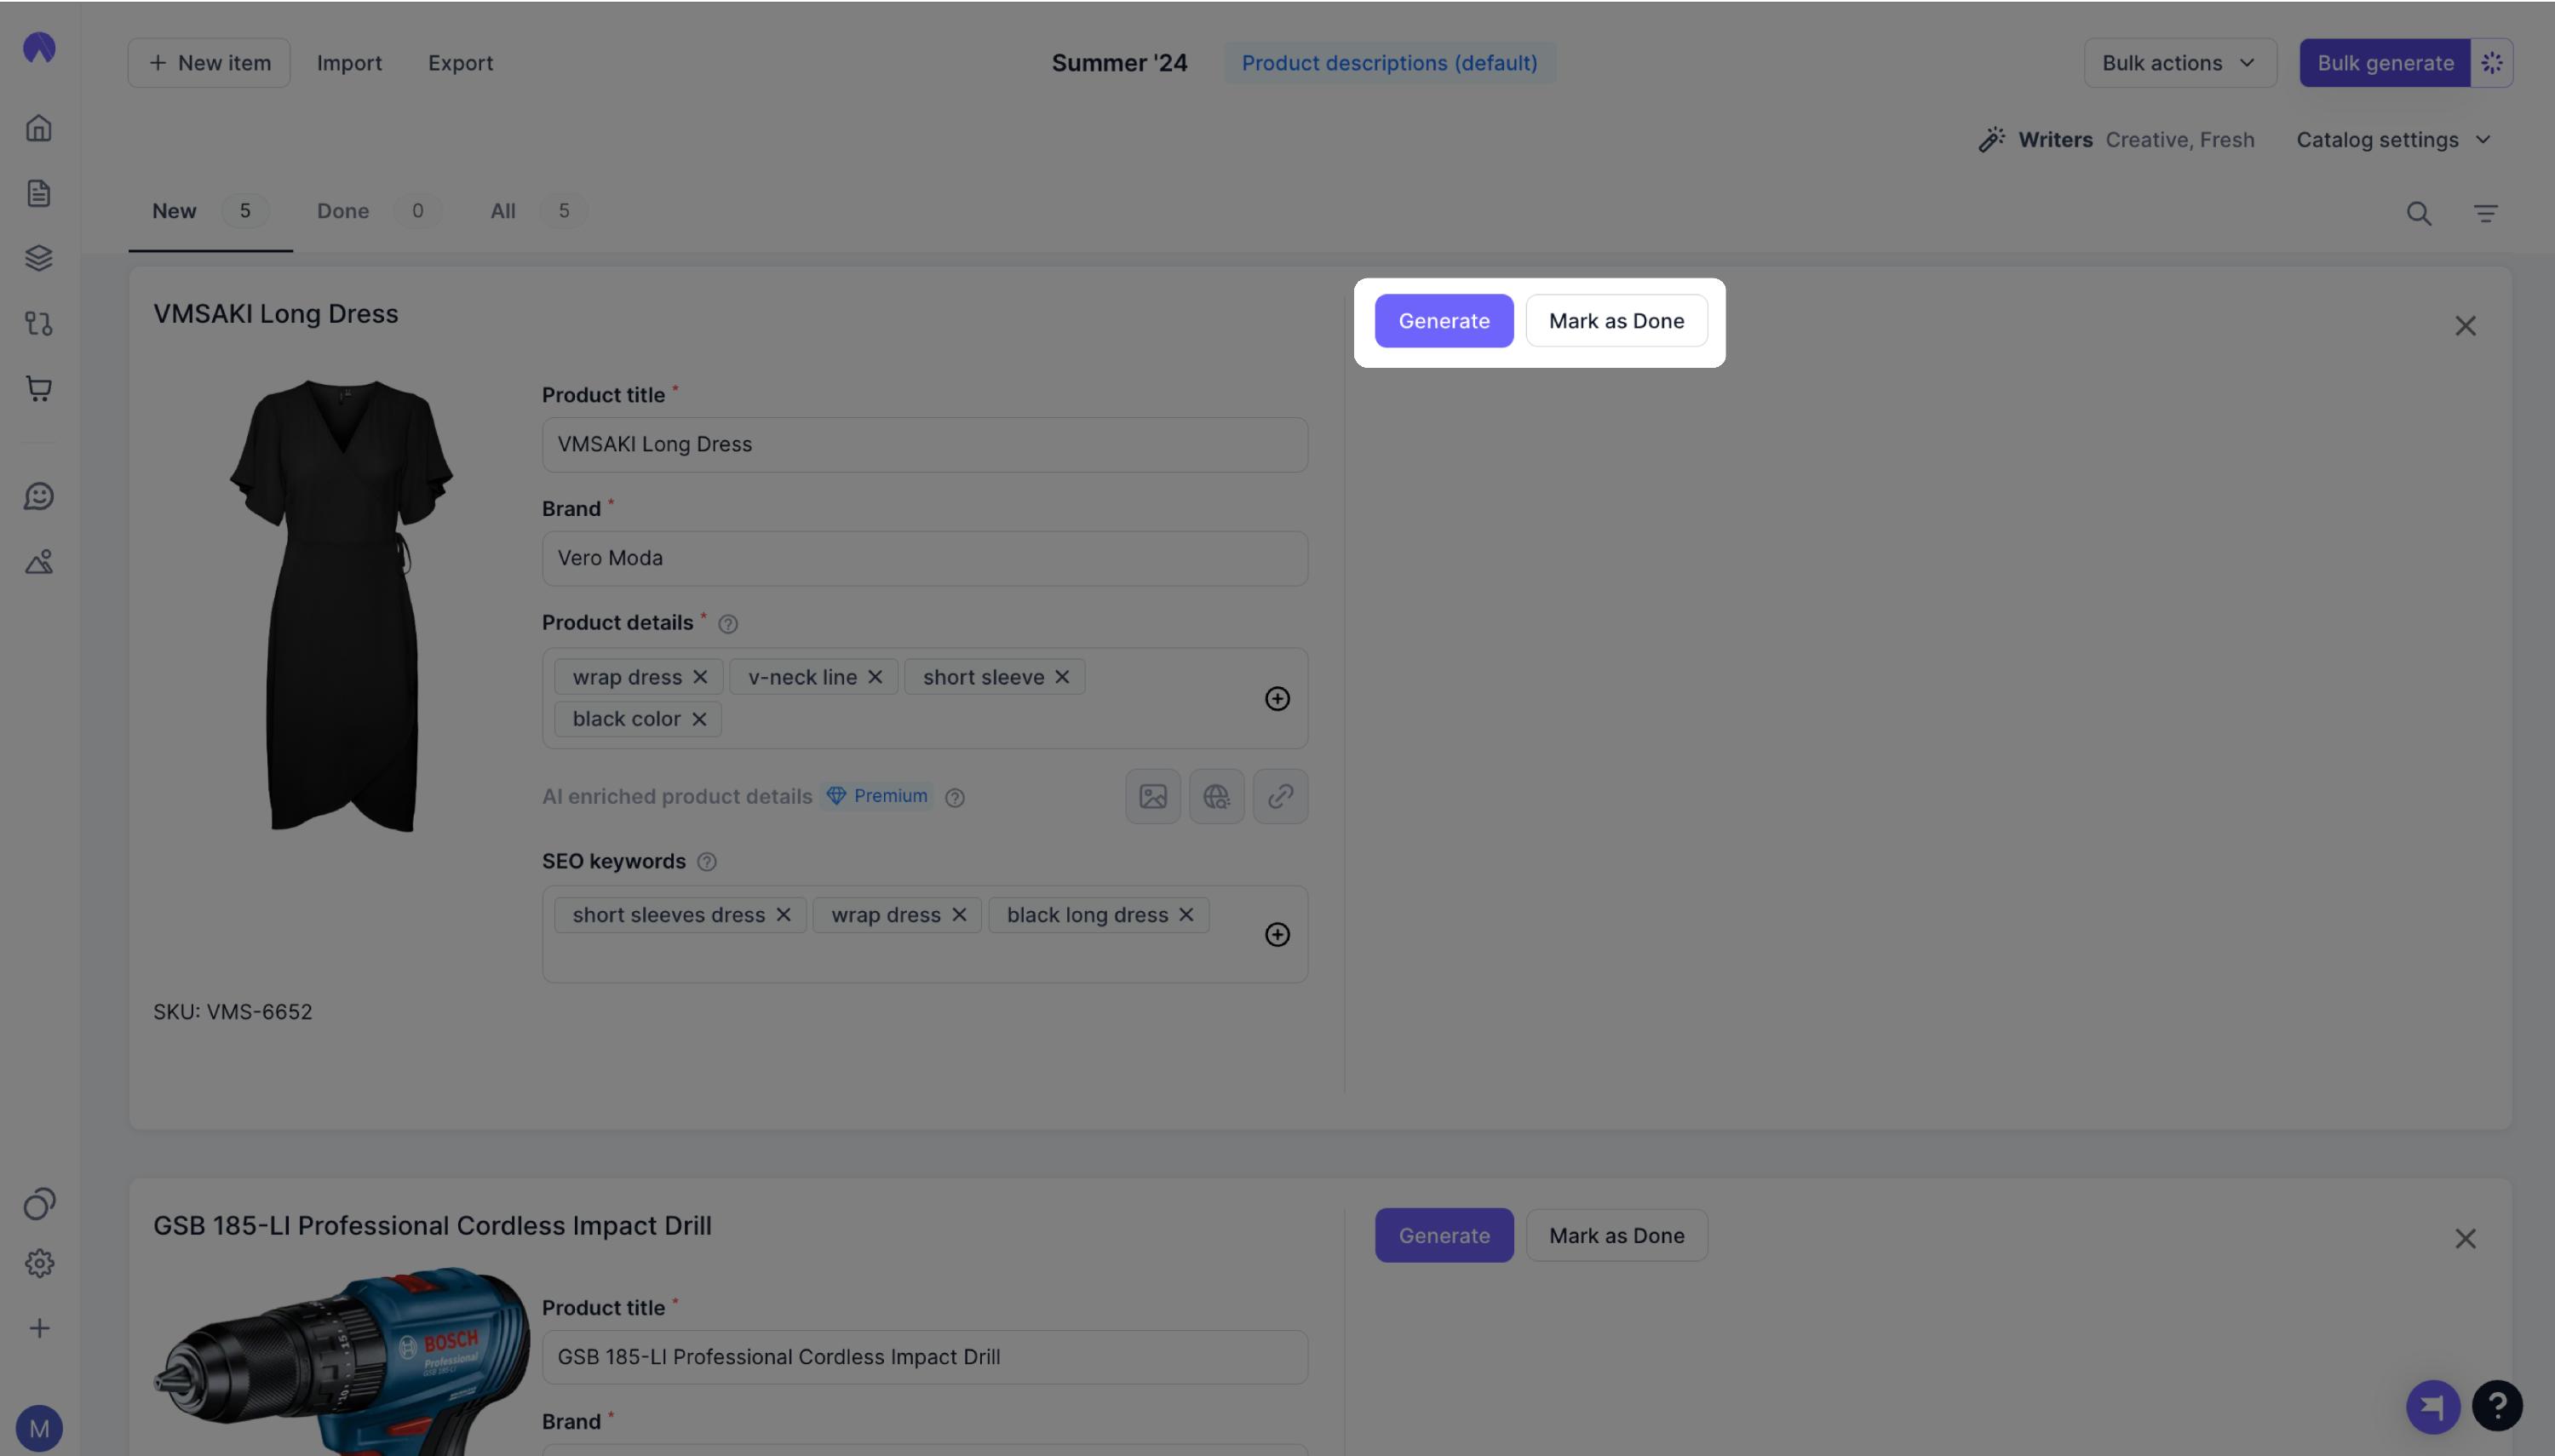
4. Generate your descriptions
Click “Generate” to create your first descriptions. In seconds, you’ll see a set of generated descriptions to choose from.
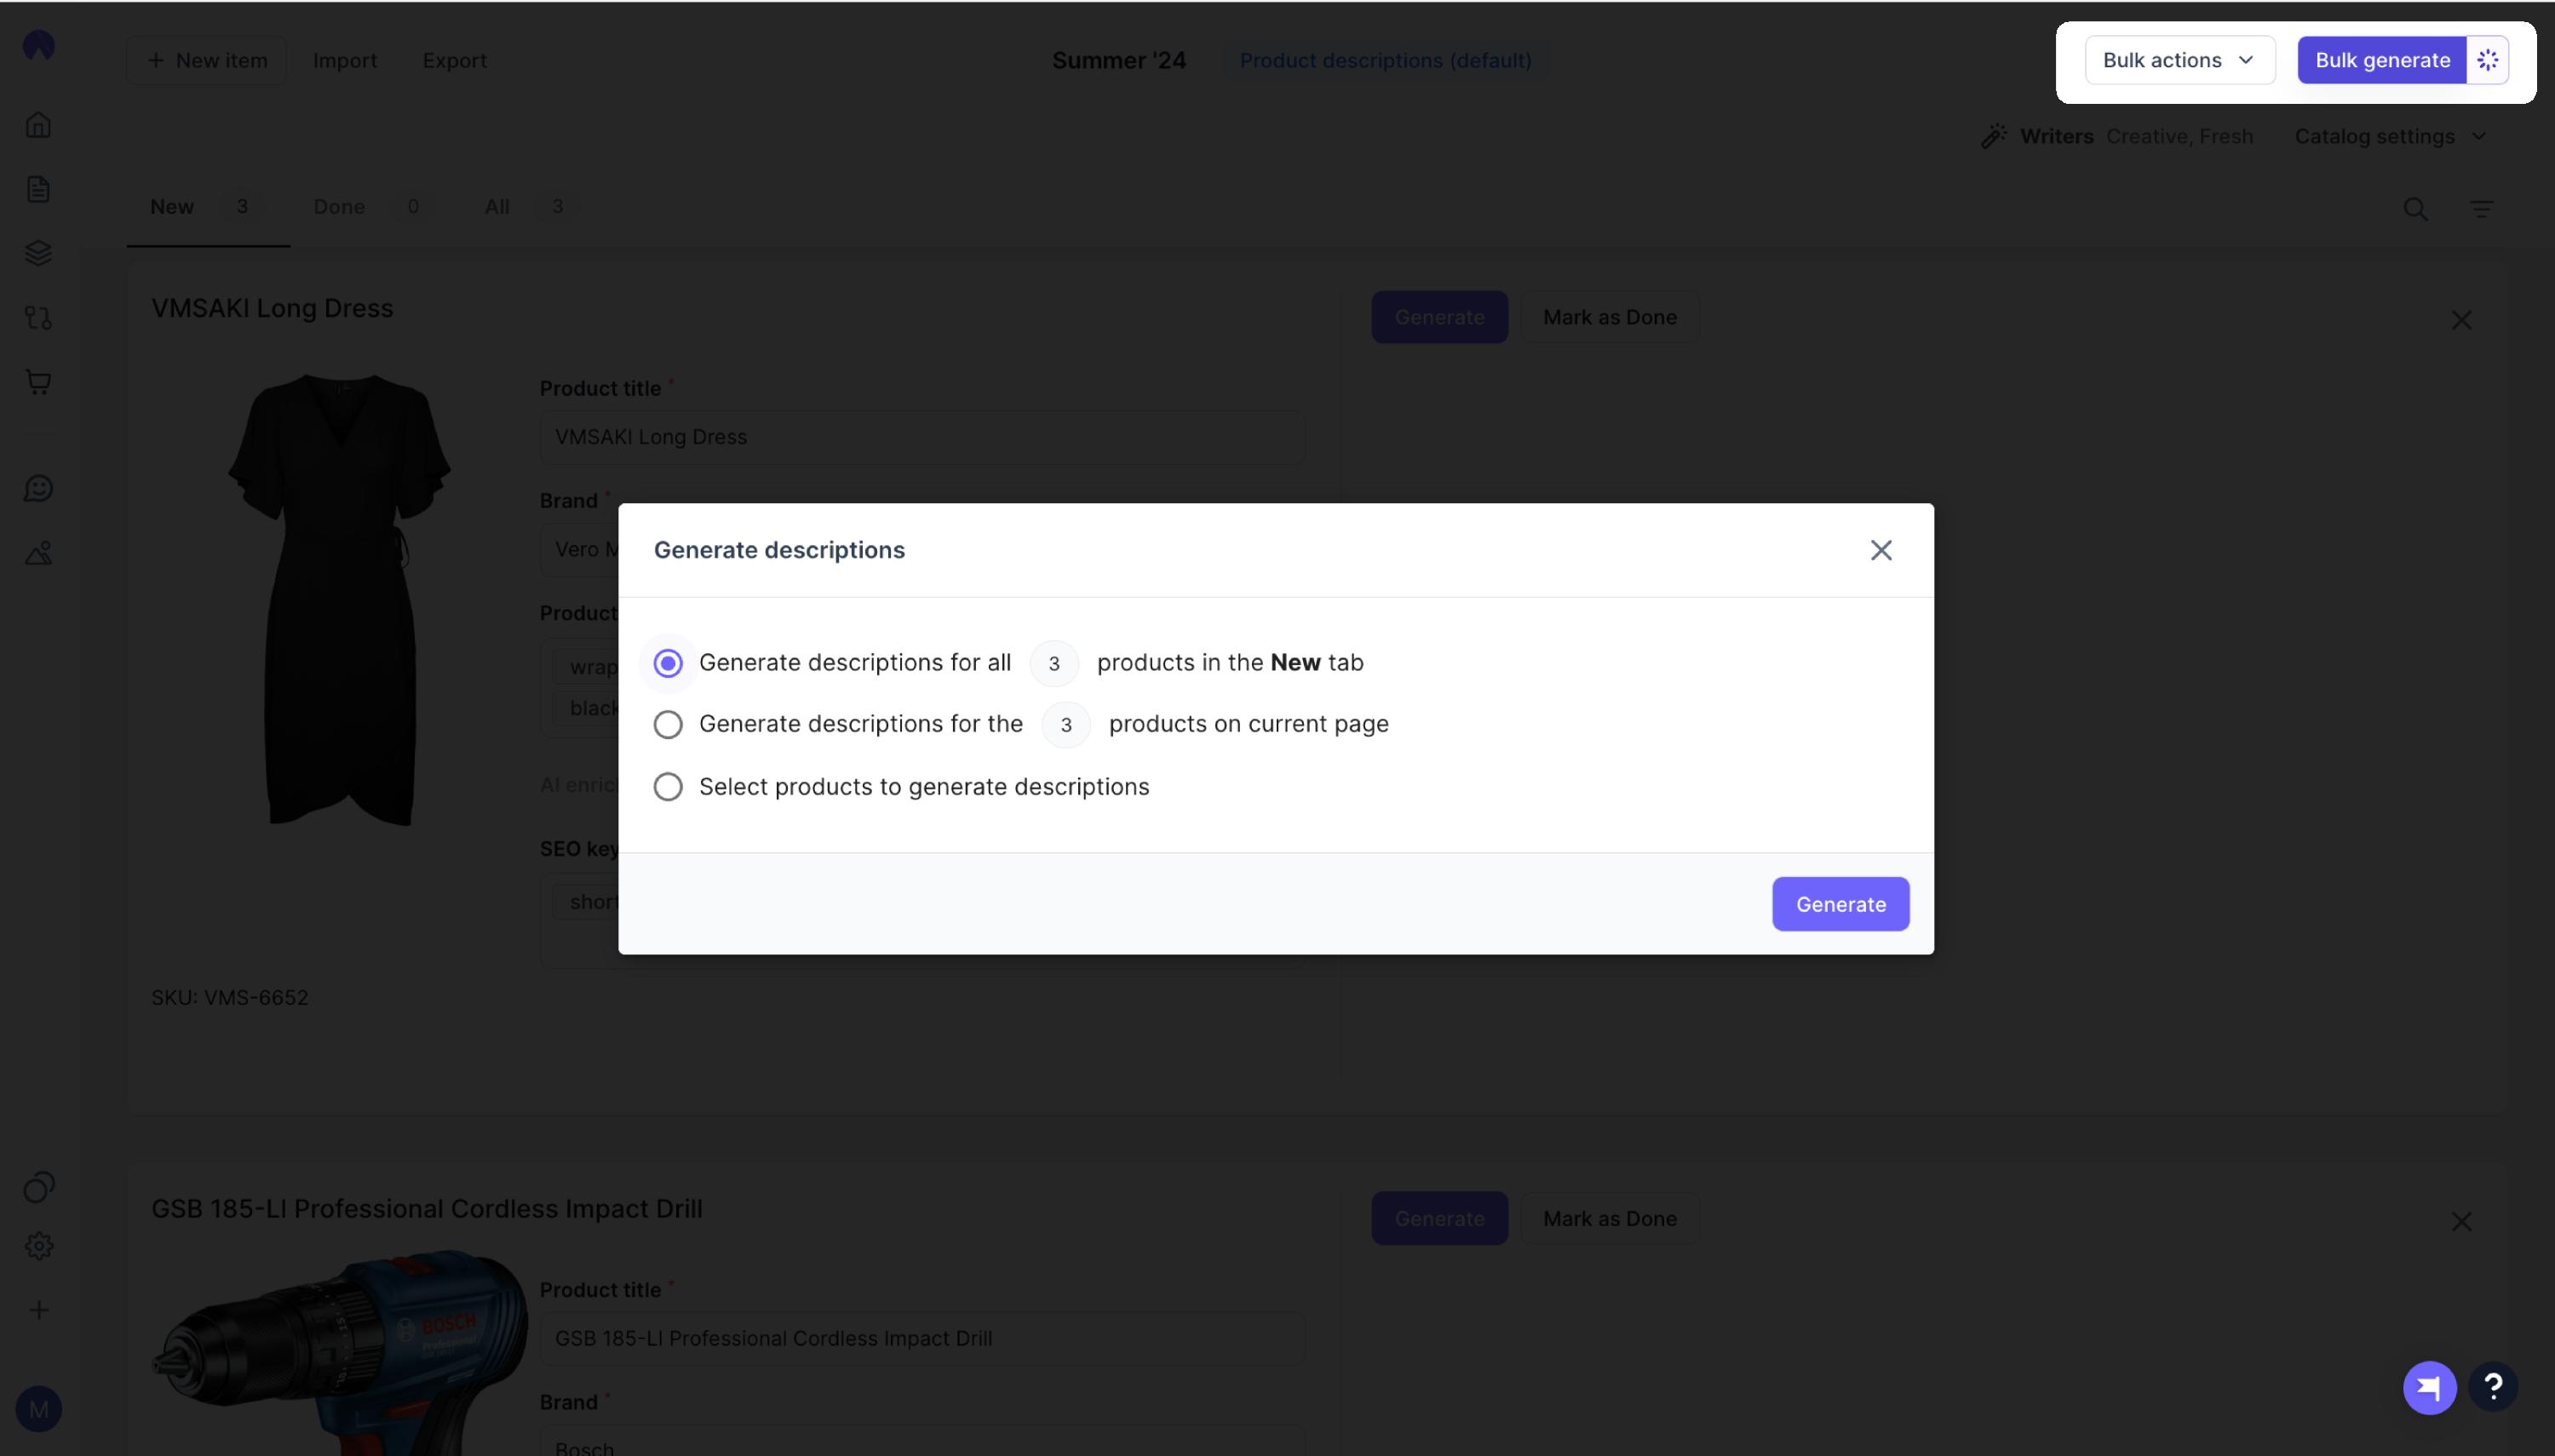
For larger catalogs, you can use the bulk generate feature for simultaneous generation.
Descriptions generated are by our default AI writers. if you’re looking for a more tailored brand voice, writing style, or description structure, reach out to support@hypotenuse.ai!
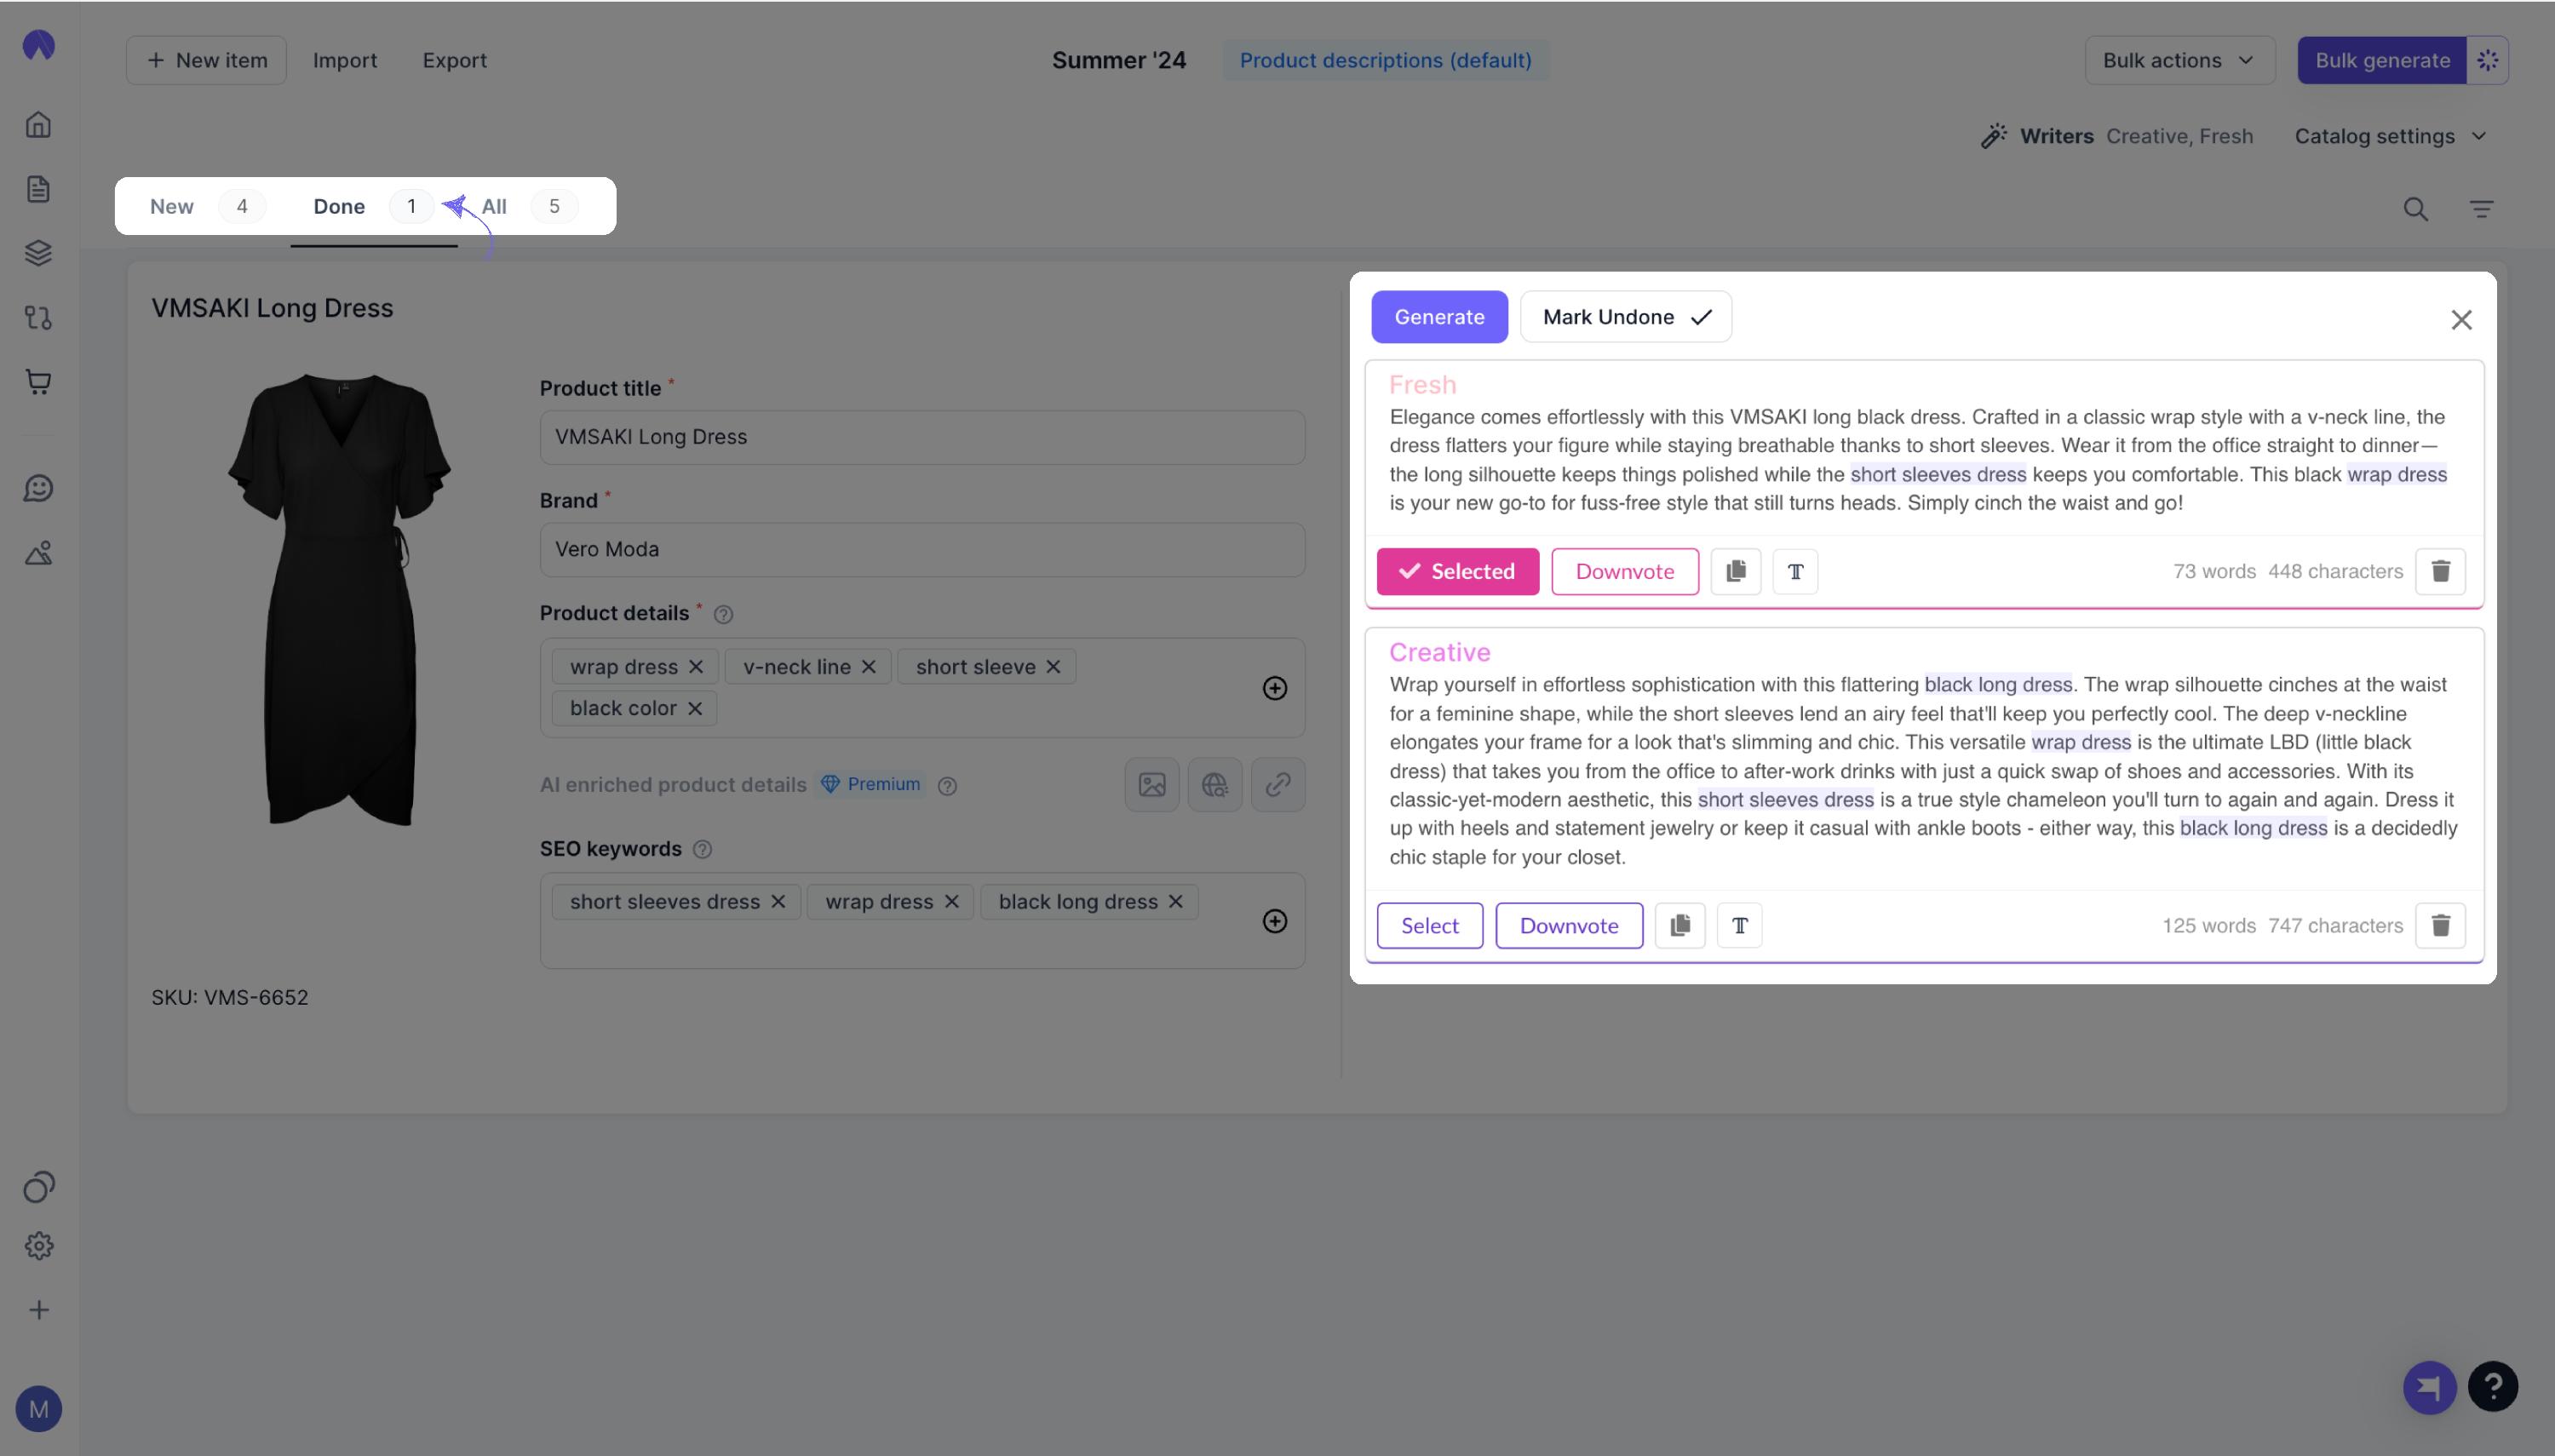
5. Review and export your descriptions
Review the descriptions to ensure they align with your product details and brand tone. If needed, make adjustments to your writer, product details, or keywords and click “Generate” again. Select the description you prefer.
Once finalized, use the “Mark as Done” feature to move the item to the “Done” tab. This keeps track of completed items and maintains a clean workspace.
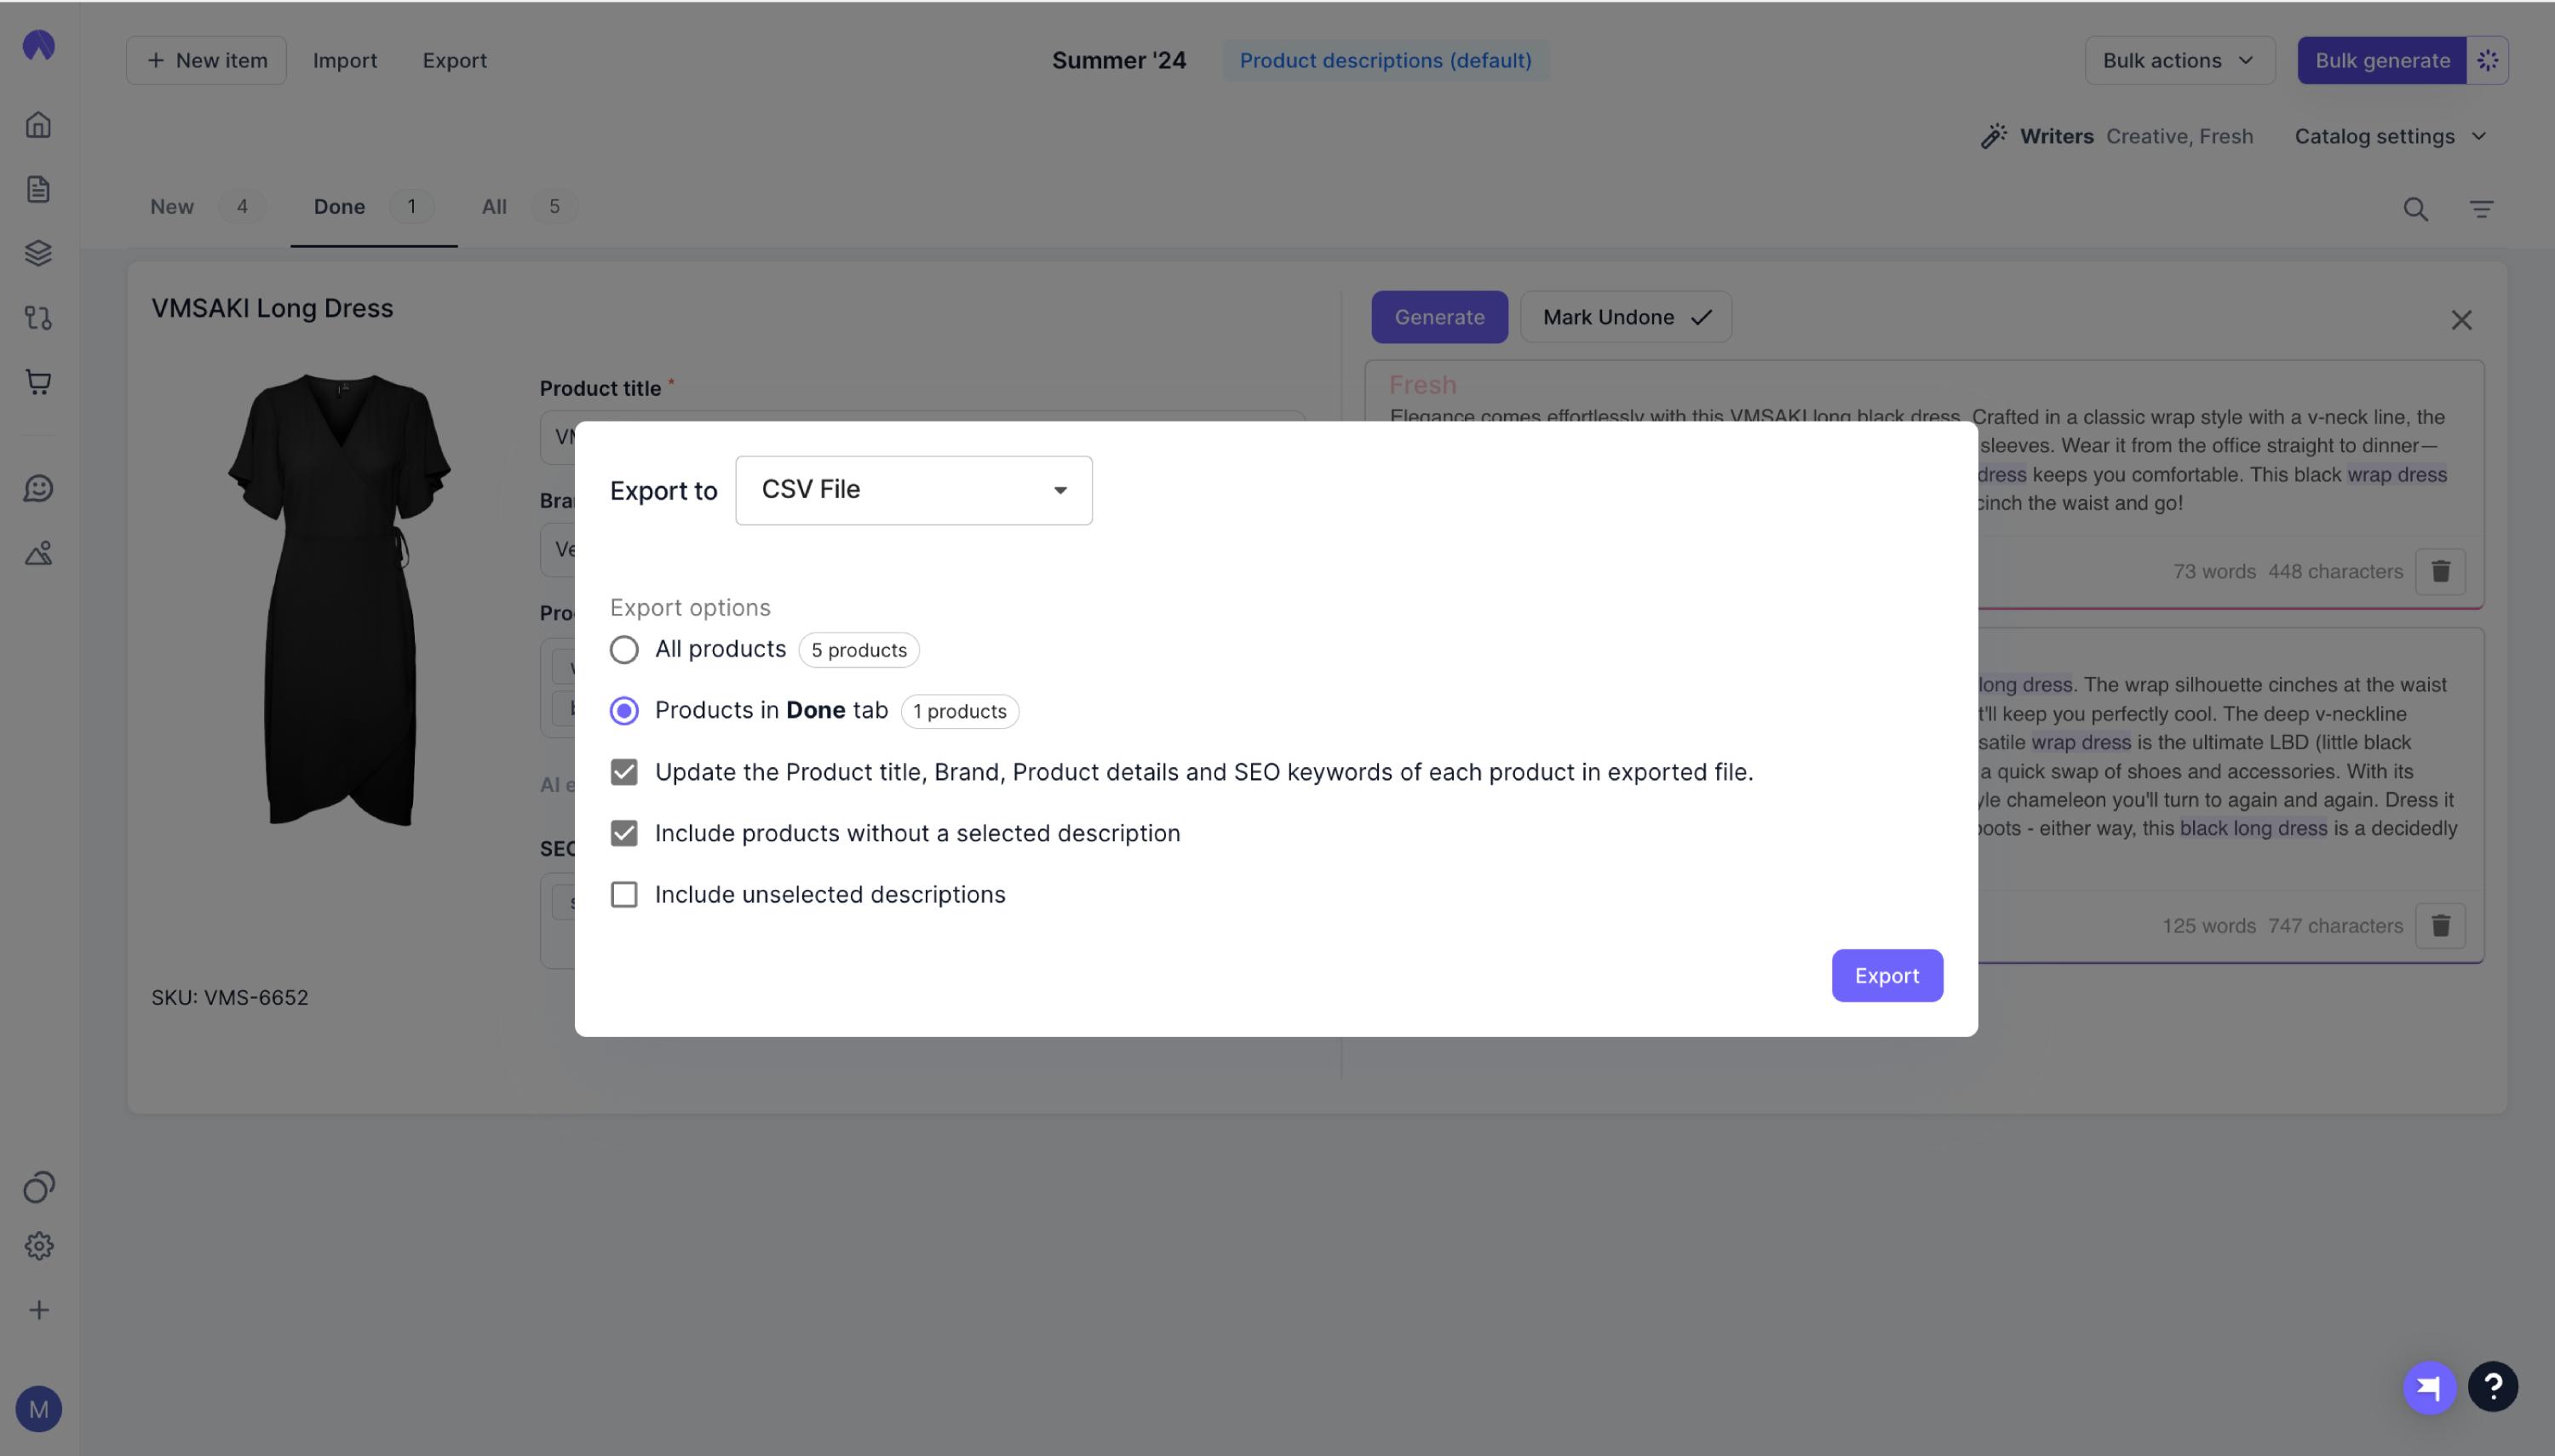
After everything has been reviewed, choose an export option — either for all your products or just the ones marked as “Done”. You can export your product descriptions as a spreadsheet file or integrate directly with your ecommerce platform, like Shopify.
And you’re all set for the creation of your first product description! If you need further support, feel free to reach out to support@hypotenuse.ai!